
Three Easy Clothing Repairs—No Sewing Machine Required
I know, clothing repairs are much more boring than a leprechaun house. But time got away from me, and besides, these needed to be done. Look for the leprechaun house next year!
So anyway, here are three simple clothing repair projects that don’t need a sewing machine:
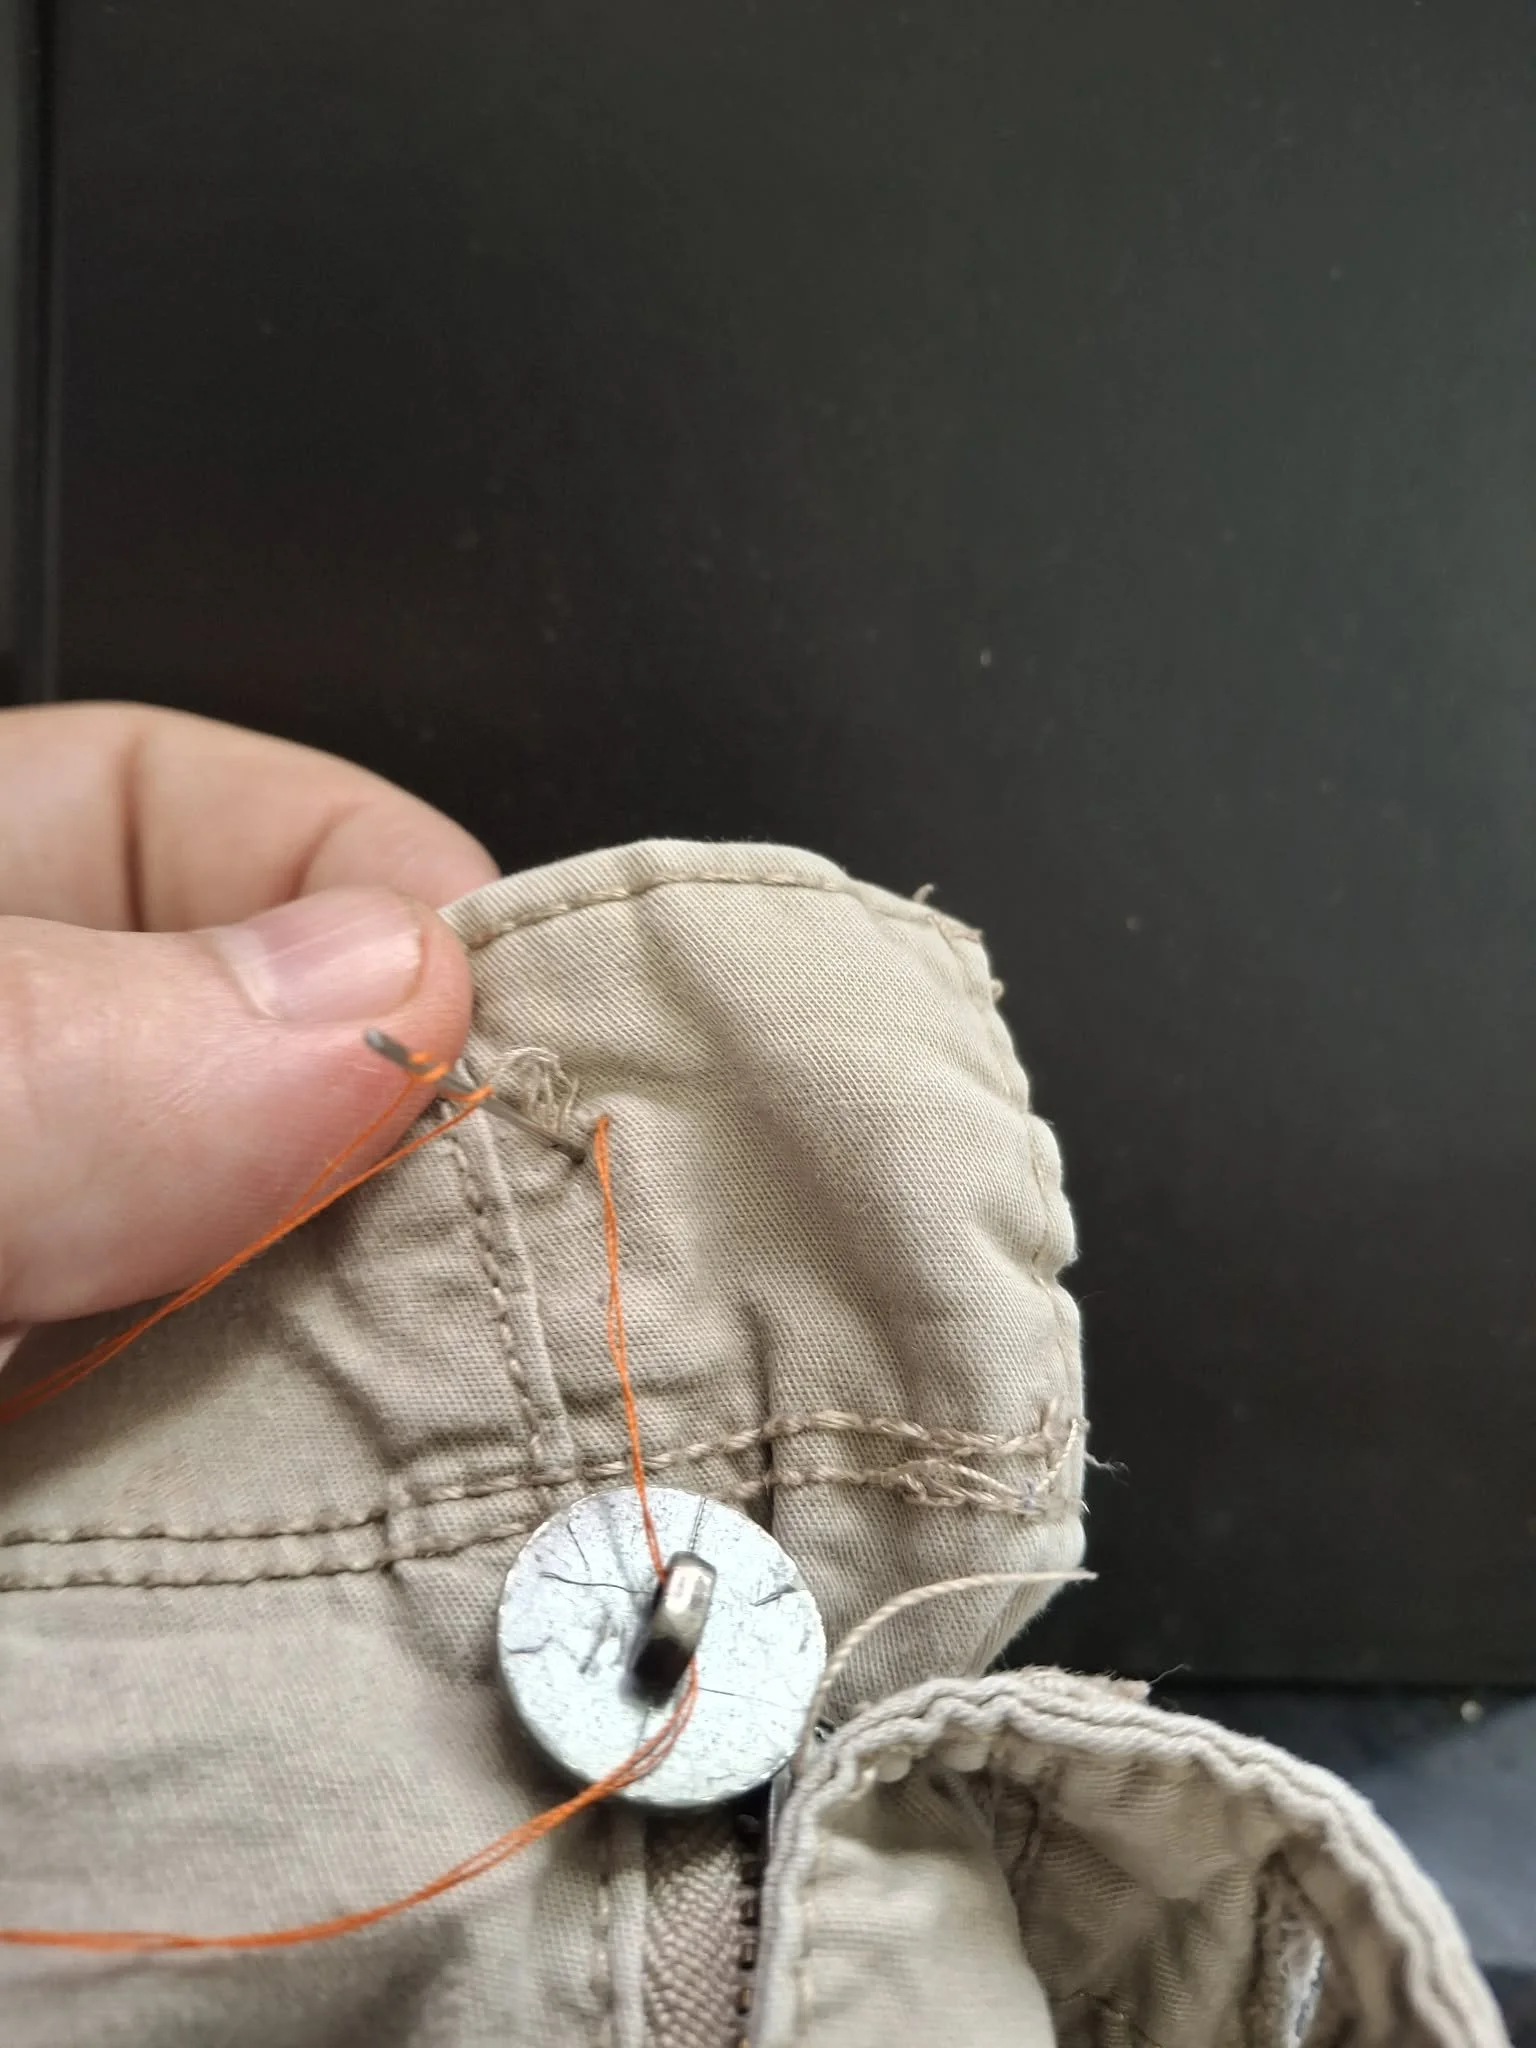
Sewing on a button
Buttons come off fairly easily so it’s a great life skill to know how to sew one on. (Confession: I know how to sew on buttons, but they always pop off on me again. Fen is showing this one.)
To measure your thread, hold out your arms wide apart, like you’re saying, “I caught a fish this big, but it got away.” Hold the tail of the thread in one hand, the spool in the other, and cut it when you have it measured. Not having enough thread is the main reason buttons fall off when sewing them again.
Thread the needle and knot the thread. Push the needle through the fabric as close to the original spot as possible.
Make multiple passes through the buttonhole or holes and your fabric until your thread runs out.
Knot the thread on the wrong side of the fabric and snip the tail.
Tips:
If you have a four-hole button, make an X with the thread and needle. This will help secure it in place.
If you are prone to crafty projects, keep a stash of buttons. They’re great for fun projects too! But then, you have one when you need one, even if it doesn’t “match” the original button from your article of clothing.
Repairing an elastic buttonhole
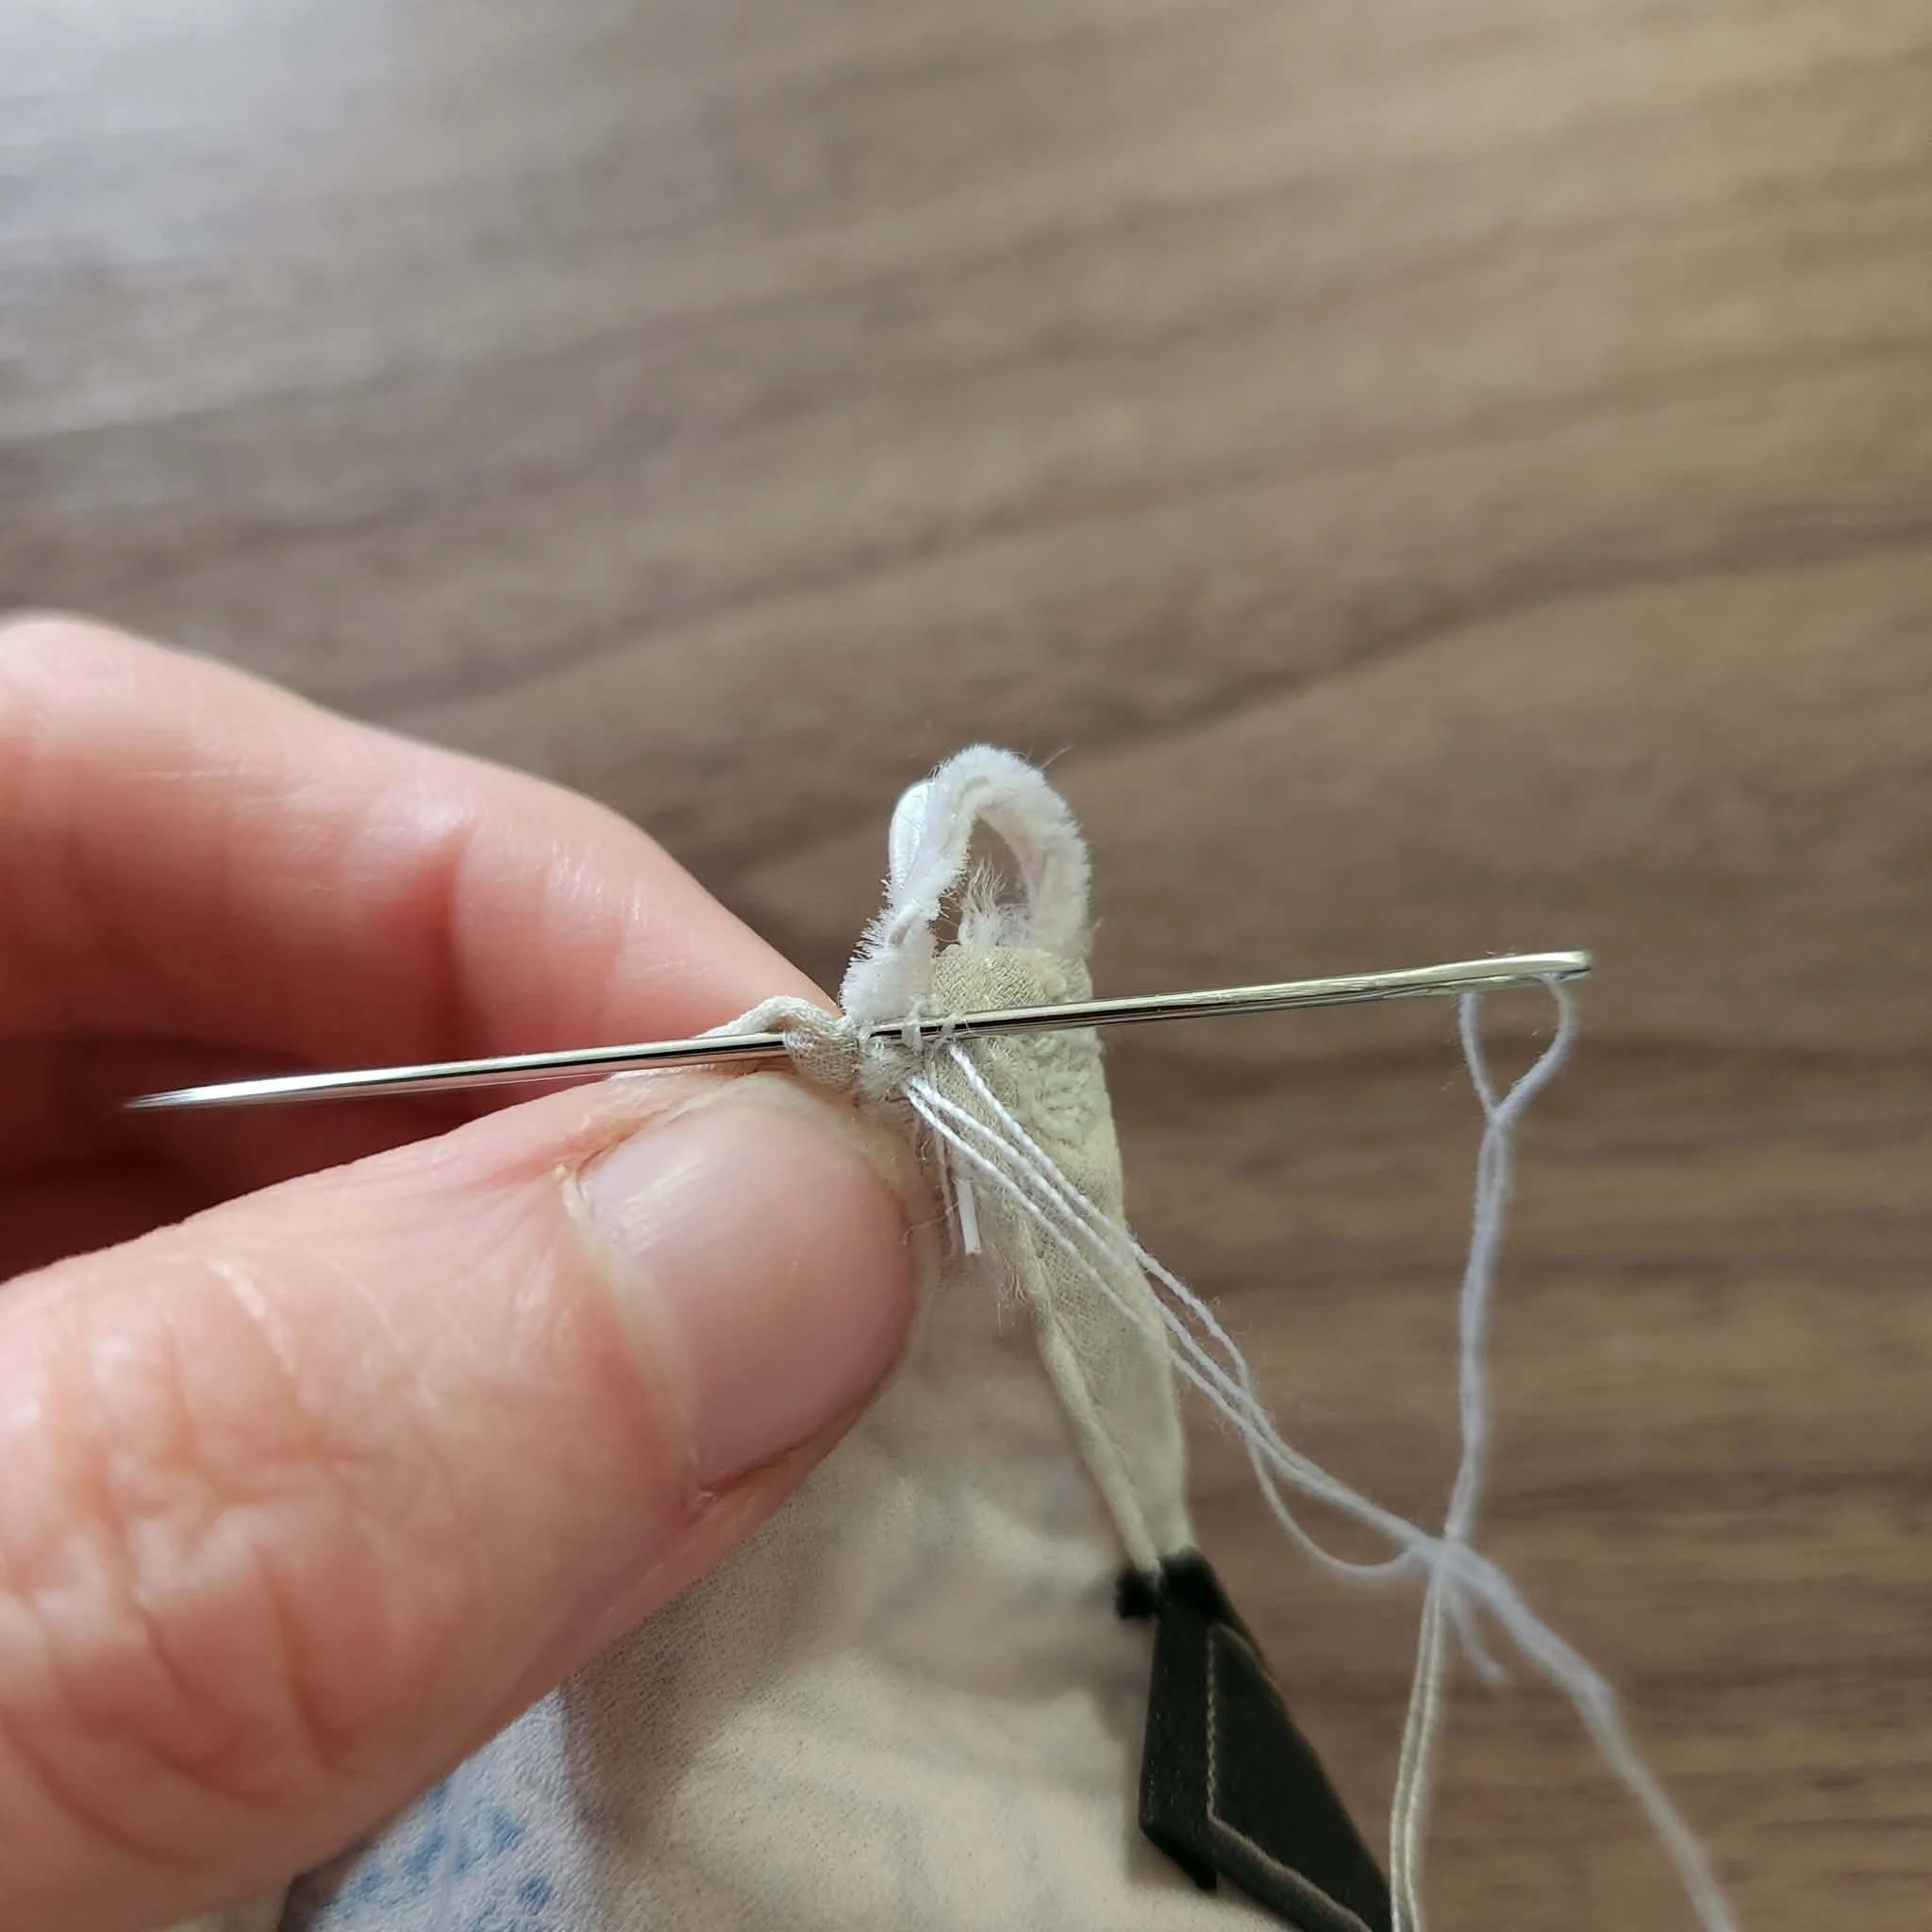
For some reason, these usually have just a small piece of elastic thread that is used to make the buttonhole, so it can come off quite easily. Luckily, it’s easy to repair.
Thread your needle and knot your thread.
Place the end of the elastic on the wrong side of the fabric.
Push the needle back and forth through the elastic and fabric several times until it feels secure.
Knot it off and cut the tail.
Tip:
If you feel like you need a little extra security, add a dab of hot glue to the knot.
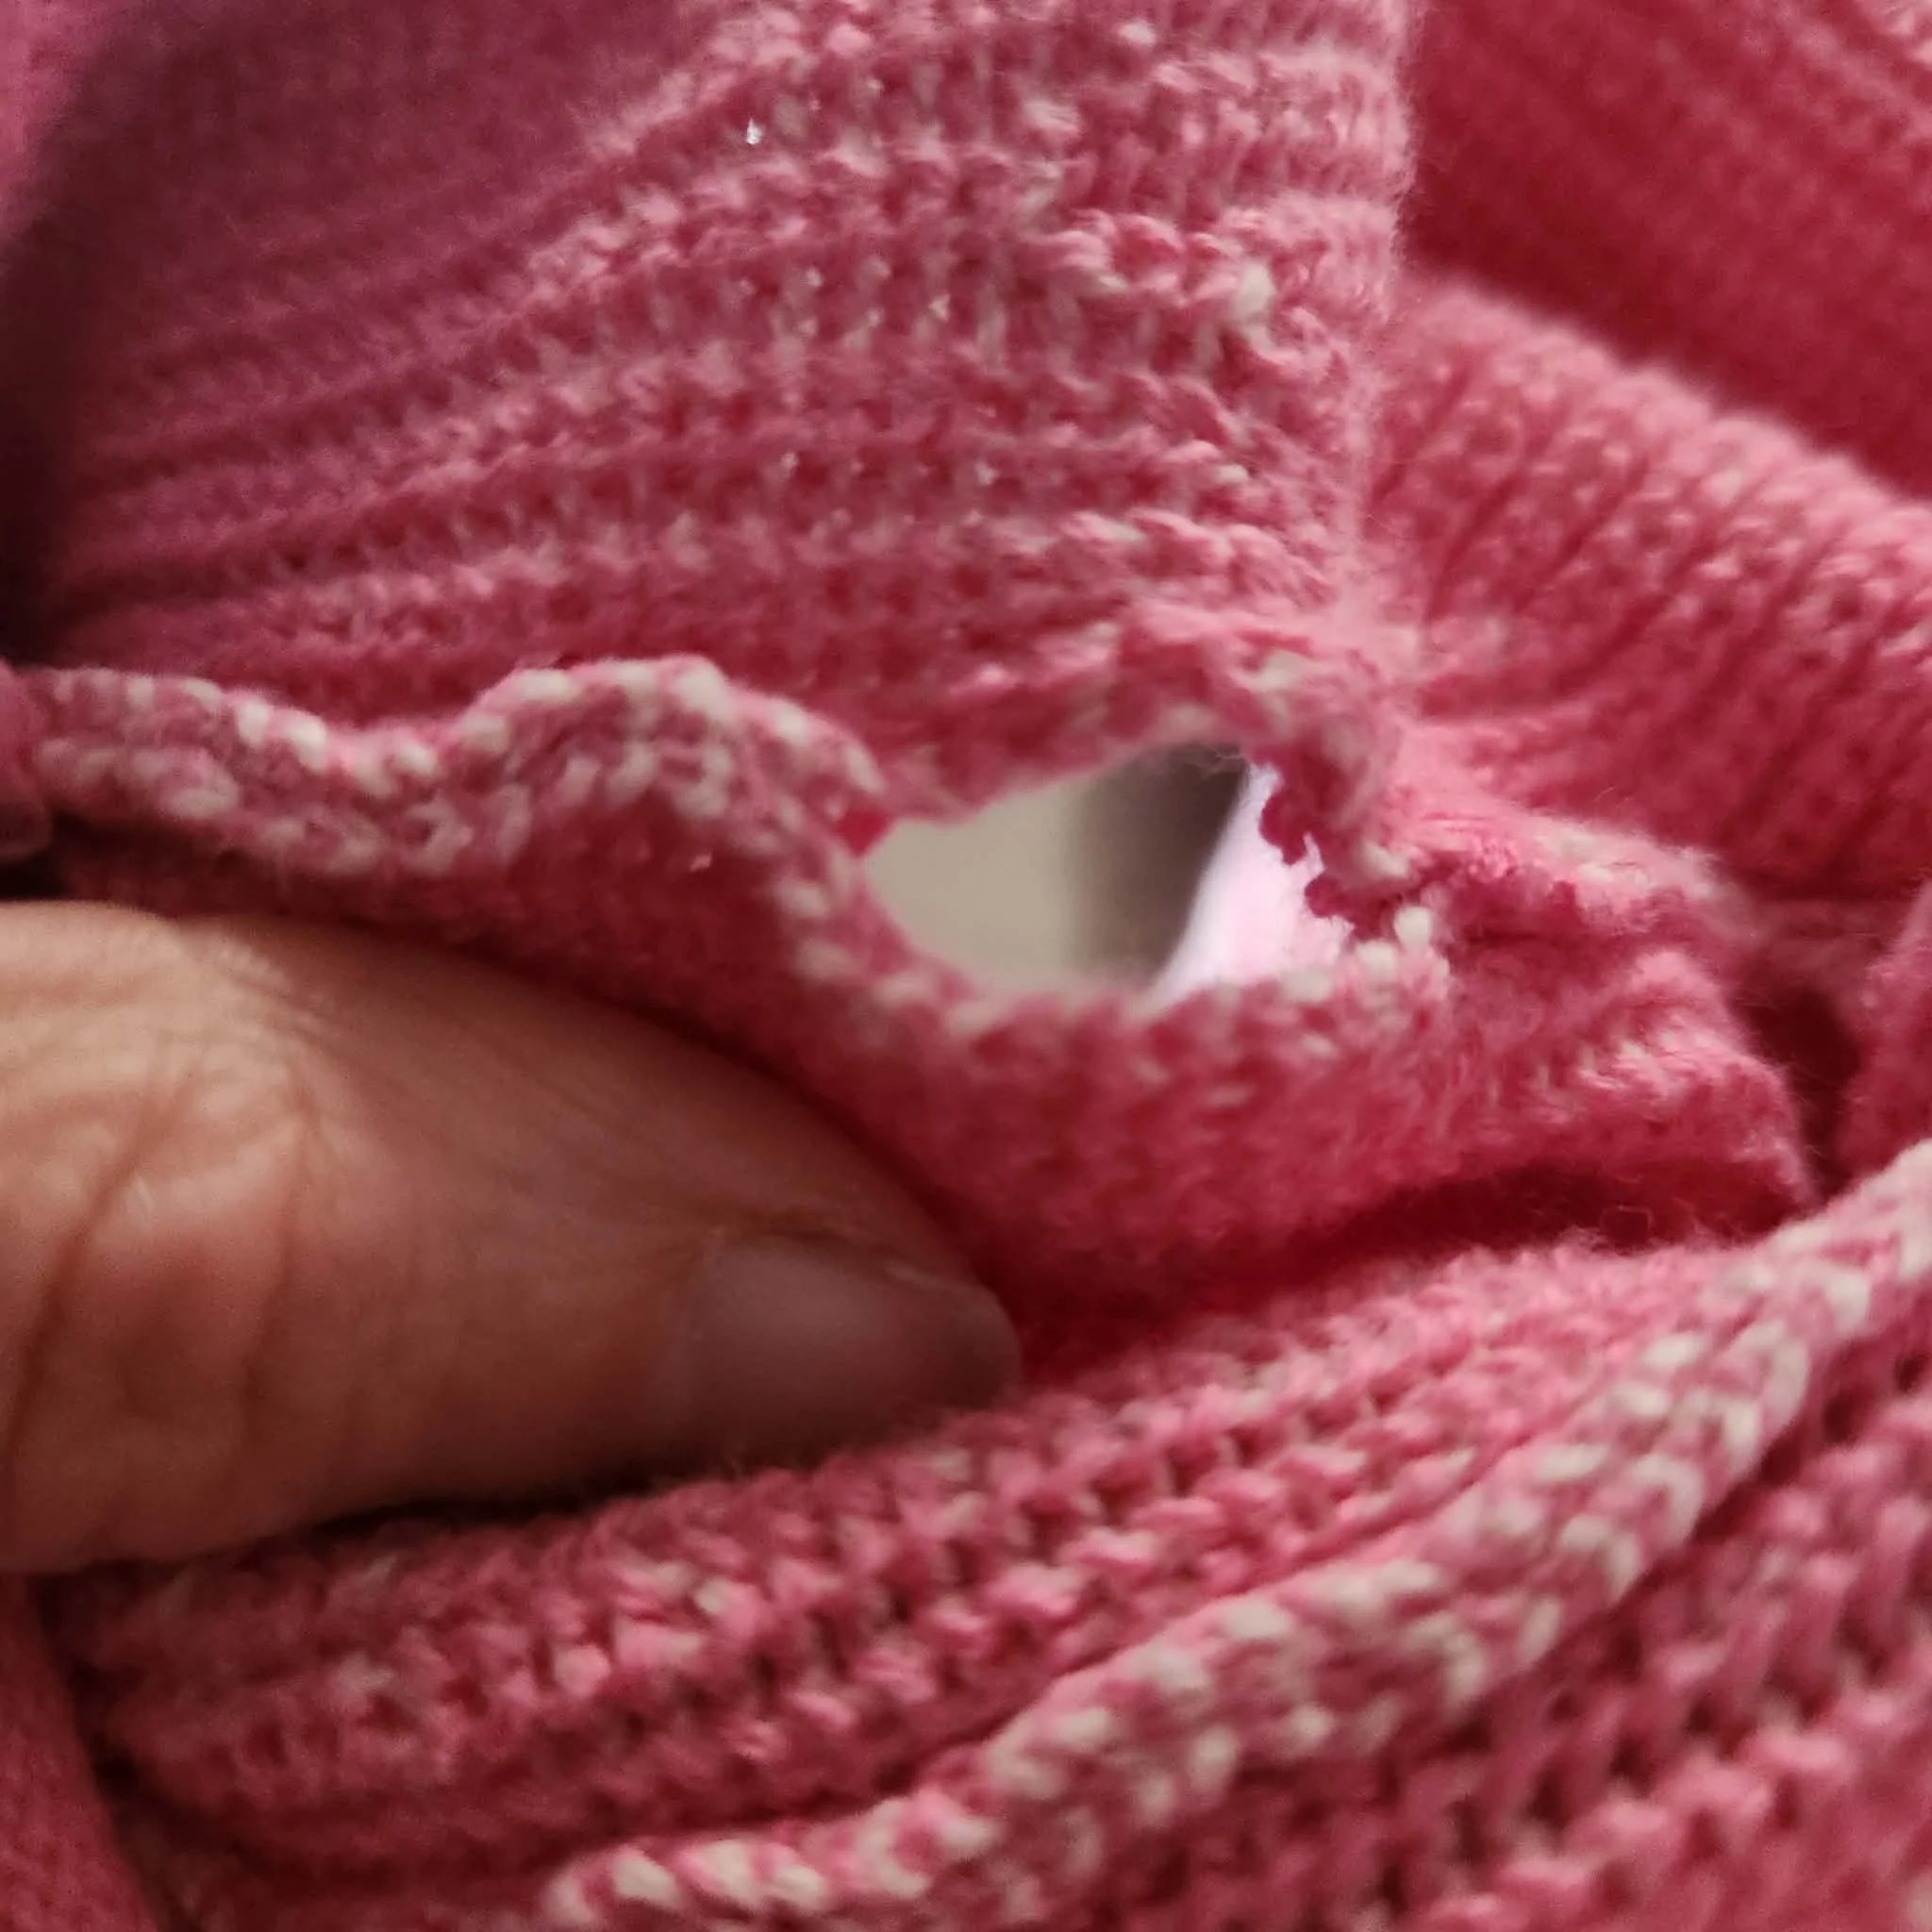
Repairing along a seam tear:
Seam tears are easy to fix because there is no measuring involved and it’s easy to line up. There’s plenty of room to make a knot.
Thread your needle and knot your thread.
Turn the clothing to the wrong side.
Imagine the hole is a little river in your article of clothing. Your needle is going to go from one “bank” to the other, joining the two. Start a little bit above the start of the “river” (start of the hole) by pushing your needle through one side and over to the other.
Go back and forth from one “bank” to the other until the “river” cannot be seen anymore. Continue on the other end for a few stitches to help seal it off.
Knot and cut the thread.
Because my fabric was knit, on the right side of the clothing, a few loose stitches were still visible. (They looked like dropped stitches in knitting.) To keep them from falling again, I rethreaded my needle, made another knot, and picked them up. This gave extra security to keep this hole from happening again.
Tip:
I hand-sewed this because my tear was small (less than one inch). If you have a larger tear, a sewing machine might be useful!
Knowing a few easy repairs for clothing is so helpful! It extends the life of your clothing, saving you money and keeping clothing out of the landfill. In my opinion, that’s a win all around for sustainability.
Check back next time, Thursday, March 19th, for an early Welcome to Spring.
Thanks for reading!
💜
Laura